Showing posts with label Gluten-free. Show all posts

Tuesday, April 16, 2013

Ten on Tuesday | Eating Healthy All Week

Last week, a lady behind me in line at the grocery store complimented me on the pile of produce, grains and other healthy food choices I had placed on the conveyor belt. Her words inspired me to start sharing more about our gluten free lifestyle and the way that we shop for, prepare, and eat food in our home. While I happily share what I know in person, it hasn't been a widely discussed topic in this space. 

Working long days for the past two weeks has reminded me just how important it is to eat healthy and balanced meals. So, this week's Ten on Tuesday is dedicated to just that  - eating healthy all week long.


1 // Create a meal plan for the week and try your best to stick to it! 

Though the concept seems like it would make little difference in your week, meal planning is a great way to save time and eat better during the week. On Sunday mornings, I take the time to plan our meals for the week. In our house, lunches are always the same (which I’ll get to in just a moment) but we like to eat a variety of dinners. During the week, I use bloglovin to save my favorite recipe posts for inspiration since I personally find Pinterest frustrating since many great pins lack the correct recipe source. After making a tentative schedule for the week, I look at the recipes in depth and take the time to create a grocery list. I find it most effective to create my grocery list by section of the store, produce/dairy/frozen. While dinners and events do come up, sticking to a meal plan helps in fighting the urge to eat out.

2 // Speaking of groceries, buy lots of produce and always start your shopping trip in this section of the store. 

Our produce for each week includes tomatoes, onions, avocados, spinach, baby carrots, celery, apples, bananas, and watermelon at the very least - depending on the season or the meals we are planning for the week, leeks, sweet potatoes, strawberries and other produce could be added to the list. I always start my trip in the produce section because fruits and veggies take up a lot of space in my cart. Seeing a full cart makes it easier to pass by the snack foods and groceries that we don't need.

3 // Portion snacks - especially fruits and veggies - for the week.

After getting groceries put away, my first order of business is to wash and portion all of our produce. Having a pineapple or watermelon in your cart is great but at home, these things won't get eaten unless they're easy to grab. Open a bag of chips or cut up a watermelon? Yeah, that's what I thought. In addition to portioning our fruits and veggies, I also divide up chips, granola, and sweets. I'm dangerous with a whole bag of chips and so having individual sized snacks is a great way to maintain reasonable portion sizes. Plus, it makes packing lunches at 6am that much easier.

4 // Add greens. To everything.

Did you know that four cups of fresh spinach only has twenty calories? Dark leafy greens are also full of vitamins, minerals, and antioxidants. For breakfast, I put spinach into quiches. At lunch, I use leaf lettuce to keep my turkey and swiss sandwiches from getting soggy - a real bonus. For dinner, spinach is added in handfuls to pastas and risottos (adding a lot of nutritional value without a lot of added flavor) while protein heavy meals are paired with simple salads. Greens are affordable, low calories, and easy to incorporate in your diet.

5 // Make breakfasts ahead for the week.

In our house, breakfast is the only meal that we make ahead but it is perhaps the most important part of our "healthy eating" steps. On Sundays, I take the time to bake veggie-rich quiches or breakfast cups for the week. With my new job, I am up by 5:30 and prepping ahead is the only way to ensure a hot, filling, healthy breakfast. If you aren't a fan of hot or large breakfasts, yogurt with granola and fresh fruit provide quick, no-prep breakfast options.

6 // Pack lunch! 

I can't emphasize this enough! With food allergies, this point is even more important for us. Packing lunch allows you to eat healthy, to save money, and to have more time during your lunch for errands, reading, or relaxing. Lately, we have gotten in the habit of picnic lunches as often as possible. Today, we were lucky enough to share our lunch hour with sandwiches in a Santa Fe park. I always try to pack a sandwich, fresh fruit, and either chips, crackers, or pasta salad. I may also sneak a little mini-snickers bar in there but hey, everything in moderation.

7 // Keep a drawer at work stocked with healthy snacks.

Healthy shelf-stable snacks include roasted and salted almonds, homemade trail mix, and granola bars. GoPicnic also makes great meals that can be stored in a desk drawer for a last minute lunch option. In addition to keeping snacks at work, I've learned to throw a snack or two in my bag and in the console of my car. Being gluten free means that I can't just grab cookies from a vending machine or french fries at a local restaurant - but even without allergies, having snacks on hand prevents you from grabbing unhealthy treats or spending unnecessarily.

10 // Try to eat more often. 

There is controversy over the best way to schedule meals - three times a day, four times a day, six times a day. When it comes to this, I will say this, listen to your body. I am an avid breakfast eater but I find that my stomach starts to growl around 10. Likewise, after a ten hour work day, I find that I'm often starving before I finish my hour drive home. For me, eating three meals a day and snacking at least once between meals helps me feel energized and full throughout the whole day.

8 // Drink lots of water.

It is said that due to evolution, the human response to thirst is so weak that many people mistake it for hunger. This time of year, especially in the desert, drinking water is easy. That being said, many people don't realize how much water they need to drink. A good rule of thumb is to take your weight in pounds, divide it by half and this indicates the ounces of water you should be drinking daily. For instance, a 120 lb individuals should drink approximately 60oz or nearly a half gallon of water. This water requirement calculator can help provide you with a more tailored and accurate recommendation. I make sure to fill my water bottle for the drive to and from work and find that drinking during my work day keeps me awake and attentive. If you aren't a fan of straight water, try lemon or other fruit infusions!

9 // Drink less caffeine!

If you are someone who drinks caffeine with multiple meals each day, try cutting back slowly. For instance, I used to drink an iced chai in the morning with breakfast and often a soda with lunch. Now, I try to limit myself to one or the other, and usually not every day. Drinking less caffeine will eventually make it easier to wake up naturally, will keep you more hydrated, and will make getting to sleep easier.


So tell me, what are your techniques for eating healthy during the work week? None of these are "unique" or "new" ideas but instead, great reminders. Do you create a meal plan for your week? What kind of snacks do you keep at work? I'd love your suggestions! 


Wednesday, April 10, 2013

Recipe | Sausage, Spinach & Tomato Quiche

IMG_8416
IMG_8422


I never thought that I'd say this, but our favorite cinnamon rolls have been replaced.
The past few weeks, we've been enjoying various gluten free quiche, instead.

Most recipes that I share with you here have gone through a few rounds of modifications, the first batch usually being so so or almost right. This quiche was an exception to that rule. As Nicole said, sometimes you just need to make something that you know will work. While I didn't know that this crust would work, I knew the right ratios for a perfect egg based filling, and a new found love of out flour so on a Saturday that Trevor chose to sleep in, I put my gluten free baking skills to the ultimate test. And what do you know, it worked. It worked beautifully, turning out to be the wheat-less equivalent of paté brisée.

The best parts of this recipe? The crust doesn't need rolled, only pressed in, and the quiche itself can be easily reheated. That means having hot quiche for 5 a.m. breakfasts and only spending Sunday afternoon baking.


Gluten Free Oat Flour Pie Crust

Ingredients:

1/2 Cup plus 3 Tablespoons of Gluten Free All Purpose Flour (Might I suggest Bob's Red Mill?)
1/2 Cup of Fresh Ground Oat Flour
1/2 Tsp of Salt
1 Tsp of Sugar
1 Tsp of Xanthum Gum
8 Tbsp of Butter, cold and cut into cubes
2 Tbsp of Ice Water


Directions:

Mix all purpose flour and oat flour with salt, sugar, and xanthum gum.
Add the butter, kneading the dough with your fingers until it resembles corn meal.
Add the ice water, continue kneading until dough is a solid ball with the butter evenly distributed.
You may need to add more water or more oat flour, depending on the texture of your dough.

When the dough has reached the proper consistency, create a ball and wrap it with plastic wrap.
Allow the dough to chill in the fridge for at least forty-fix minutes before using.
(Dough can also be made in advanced and either left in the fridge for a few days, or frozen.)

After the dough has chilled, spray a nine-inch glass pie pan with non-strick spray and press the crust evenly across the bottom and sides of the dish.


Sauage, Spinach and Tomato Quiche Filling

Ingredients
1/3 Pound of Sausage
2 Cups of Sliced Leeks (diced sweet or white onion can also be used)
2 Cloves of Fresh Garlic, mince
2 Cups of Fresh Spinach
1 Can of Hunt's Fire Roasted Diced Tomatoes, rinsed
(I highly recommend these tomatoes - we're obsessed - but fresh or regular canned tomatoes could be used)
5 Eggs, lightly beaten
1 Cup of Heavy Cream
1/2 Tsp of Salt
1/2 Tsp of Pepper, or to taste 
1 Tsp of Sage
1 Cup of Shredded Mozzarella, Provolone or Parmesan


Directions: 

Preheat the oven to 425 degrees.

Brown sausage in a large skillet.
Add leeks and garlic, sautéing until soft and translucent.
Chop spinach and add to the skillet, mix well.
Add tomatoes and stir until everything is heated.

Beat eggs, cream, salt, pepper and sage in a medium bowl.
Cover the bottom of the pie crust in shredded Italian cheese.
Then, add sausage mixture to the bottom of the quiche.
Cover with egg mixture, and sprinkle with more cheese.
(You may not need all of the sausage mixture or all of the egg filling, use your best judgement)

Bake for ten minutes at 425, then lower the oven to 375 degrees and bake for another 30 minutes or until firm.


So tell me, what are your favorite things to put inside a quiche?


IMG_8418

Wednesday, January 23, 2013

WIAW | Gluten-Free, Vegan Cinnamon Rolls


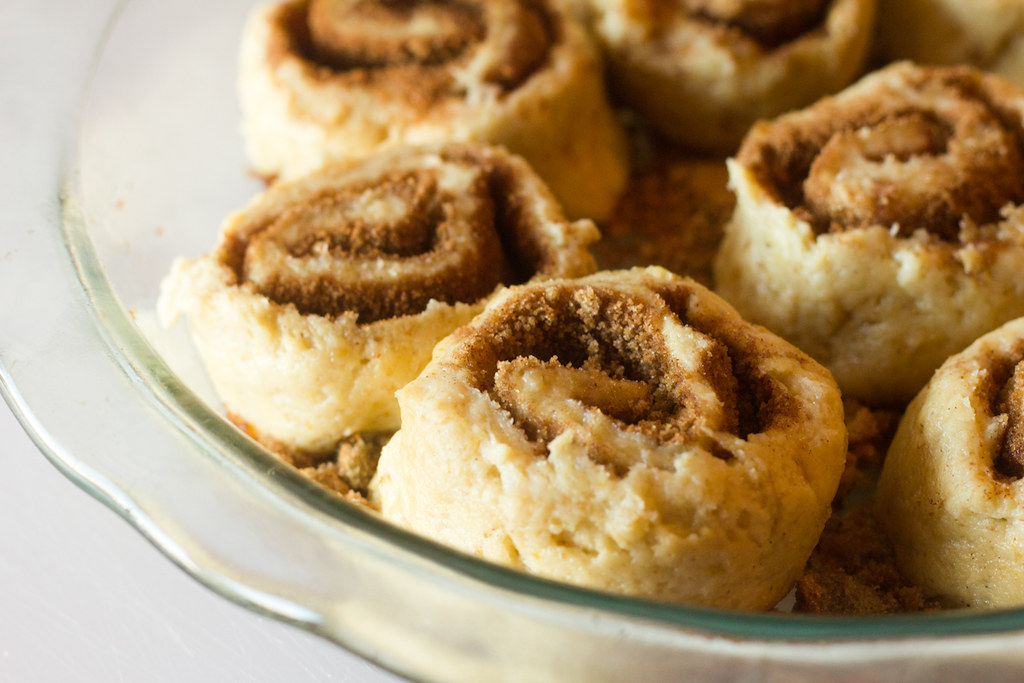
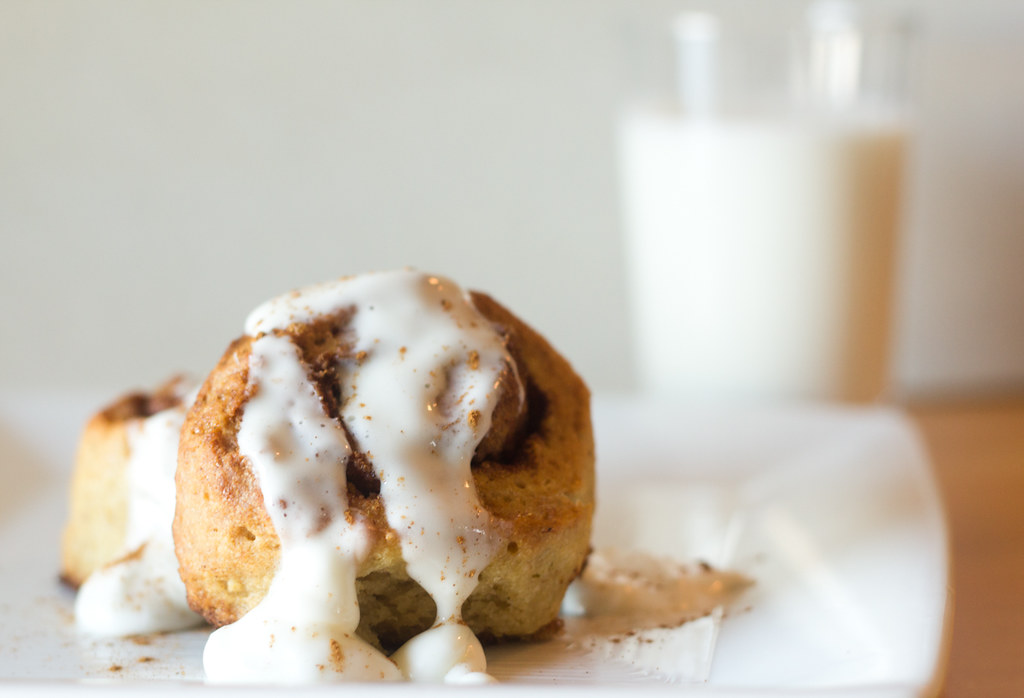
I've been anxiously waiting for Wednesday to come so that I could share this recipe with you. While I'd really love to share a batch of these with a cup of hot tea, that seemed a little harder to do. While I first created this recipe as the start to a Christmas morning tradition, I didn't feel that I had gotten it quite right. But now, after a few alterations, I am here to share with you a recipe for hot, fluffy, classic cinnamon rolls... only without the wheat, eggs or dairy.

If you're new to this link-up, What I Ate Wednesday is hosted weekly by Jenn at Peas and Crayons. The idea is to share a days worth of eats. While I'm a bit embarrassed to admit it, these cinnamon rolls made up a whole day of eats for us on Saturday. We woke up unusually early and with an immense pile of homework, I couldn't think of anything better to do with the extra time than bake these.


In total, this recipe takes at least an hour and a half. I find it easiest to make the dough early in the morning and then allow it to rise while I take care of some weekend chores, like laundry. When I first made this recipe, I prepared the dough and roll at night, baking it the next morning. Though they were still delicious, the rolls weren't quite as fluffy and light that way.

Before going gluten-free, I had never imagined making cinnamon rolls from scratch. After all, Pillsbury was the standard in our house. That being said, homemade cinnamon rolls are not nearly as difficult or as daunting as they seem to be and I truly enjoy eating baking them.


Ingredients

Dough
2 Tablespoons of Earth Balance All Natural Spread
1/4 Cup of White Sugar
2/3 Cup of Almond Milk
1 Packet of Fleischmann's Active Dry Yeast
1 Flax Egg (1 Tbsp of Flax Meal + 3 Tbsp of Water)
1/4 Cup of Canola Oil
1 1/2 to 2 Cups of Gluten Free All Purpose Baking Power from Bob's Red Mill
1/4 Tsp of Baking Soda
2 Teaspoons of Xanthum Gum
2 Teaspoons of Baking Powder
1/2 Teaspoon of Salt
2 Teaspoons Vanilla

Filling
1/2 Cup of Light Brown Sugar
2 Tablespoons of Cinnamon


Directions

For best results, mix your flax meal and water prior to starting the recipe. Flax eggs work best when allowed to rest in the refrigerator for ten to fifteen minutes.

Warm 2/3 cup of almond milk to 100 - 110 degrees. This temperature is very important and I strongly suggest using a thermometer to ensure that your milk is not overheated, as hot milk will kill the yeast. Dissolve one packet of active drive yeast in the milk and allow it to bubble for ten minutes. While the yeast bubbles, sift together 1 1/2 cups of all-purpose flour, baking soda, baking powder, xanthum gum and salt.

After the yeast has had time to dissolve properly, combine the almond milk with the sugar, butter, oil and vanilla. After combining thoroughly, add the flax egg and stir until evenly mixed. At this point, begin slowly adding the dry ingredients to the wet. Your dough will be sticky but if it appears too wet, feel free to slowly add additional flour to make it easier to work with.

Because of the yeast, you will need to remove the dough from the mixing bowl and place it in a greased dish to allow the dough to rise for approximately one hour. It is best to put the dough in a warm spot and during the Montana winter, I've found the best option to be our fire place mantle. While the dough rises, feel free to get your filling ready by mixing the brown sugar and cinnamon. Traditional recipes call for a lot of softened butter but I find it isn't necessary, especially for frosted rolls.

As I said, I typically walk away from the dough to work on other projects and so I choose not to preheat my oven right away. You will want it to be at 400 degrees prior to baking, though.

When the dough has risen, prepare a work surface with two sheets of parchment paper at least a foot long in each direction. Place the dough between the sheets and roll it to about 1/4" thick. Try to keep the dough straight at the ends, feel free to rework the dough until you get a shape you are comfortable rolling.

Remove the top sheet of parchment paper and sprinkle the brown sugar and cinnamon mixture liberally on the dough, leaving an inch-long strip bare at the far end of the square. You will have leftover mixture and this can be placed in the bottom of your glass baking dish. 

I find it easiest to start the roll with my fingers and then continue using the parchment paper. Try to roll as tightly as possible. When you reach the end, the bare dough will allow you to "seal" your roll. Then, using a serrated knife, cut the roll into 8 pieces. To ensure even sized rolls, I find it easiest to cut in the center and continue cutting each piece in half. Place the cinnamon rolls in a greased glass pie dish and bake for 18 - 22 minutes or until rolls are firm on the outside and golden brown on top.

While the rolls bake, I prepare a simple frosting. Though the rolls themselves are vegan, I personally chose to make a classic cream cheese frosting for myself. Trevor enjoys his rolls plain and therefore I can justify the dairy. If you'd like to keep the recipe completely vegan or dairy-free, a simply glaze can be created using almond milk - simply add confectioners sugar and beat with an electric mixer until you reach a frosting consistency.


These have become a quick breakfast favorite in our home since eggs and pancakes are no longer easy options. While I'd like to think that a batch of cinnamon rolls could be made to last through the week, we can't stay away from them and like I said, they are usually gone within the day. If you are too busy to invest time in making cinnamon rolls regularly, feel free to match two batches at once, freezing half.
Is there one food you truly miss eating, or perhaps a whole list? A recipe that you wish could be easily transformed to be gluten-free, vegan, or both? While cinnamon rolls were always on that list for me, I've been on a mission to create allergy-friendly breakfast items for Trevor to take to work. I think doughnuts are next on my baking bucket list.


Tuesday, January 15, 2013

Recipe | Roasted Sweet Potato Burgers

I just realized that today is Tuesday. Perhaps this shouldn't be such a revelation but lately I can't seem to get my sleep schedule quite right and my mornings have been a bit foggy. Between the hours spent in front of my computer and the pile of books that I need to read for class, by the end of the day, my eyes ache and I want nothing more than to sleep. However, my brain seems to take an hour or two to catch up to my body and by the time I fall asleep, it feels like Trevor is getting up for work. All of that to say: I decided to skip Ten on Tuesday today because this recipe just couldn't wait.


Trevor and I have both agreed that our early nights during the week leave little time for dinner making. After all, we have more important things to do than eat.. things such as watching countless episodes of Twin Peaks or making it to the gym. While Trevor seems to eat a rather balanced lunch made up of fruit, granola, pickles and peanuts (I wish I was kidding, people), I don't seem to eat much of substance during the day. Though Trevor was happy to veto the idea of dinner all together, I got creative and spent Sunday making dinner for the whole week. The best part of these burgers is that they are healthy and filling without being heavy or guilt-inducing. Plus, they make a great excuse for eating extra avocados.

I had remembered reading this recipe for sweet potato burgers early in the fall and went back to it for some inspiration. That being said, my take on the recipe is both gluten-free and vegan. (Though the same cannot be said of the roasted garlic aioli I poured on top of mine. But if anyone has any ideas for egg-free sauces, do share!) The real key to these burgers lies in roasting the potatoes, though. You should know that I will not eat anything that is burnt. Lately I've been questioning my abilities to be an adult (case in point: I am terrified of having to get two fillings tomorrow.. yes, two baby cavities seem to have snuck up on me. The agony.) and I put my finicky refusal to eat charred things on that list. That being said, blackened sweet potatoes are the key to this recipe and achieving a deep smoky flavor. The finished patties must also be fried until nearly black on both sides to ensure that the burgers and hot and cooked all the way through. While they taste delicious, the child in me tends not to look at the crispy blackened parts while I eat. Now that we've got those interesting facts out of the way, let's make burgers.

Ingredients
2 Large Sweet Potatoes
1 Cup of Cannellini Beans, drained and rinsed
2 Garlic Gloves, minced
2 Tablespoons of Nut Butter (I used Justin's Maple Almond Butter)
1/3 Cup of Corn Meal
1/3 Cup of Gluten-free Bisquick (any all-purpose flour or rice flour can be substituted)
1 Flax Egg (Combine 1 tbsp flax meal with 3 tbsp of water and let rest in the fridge for 15 minutes or more)
2 Teaspoons  Smoked Paprika
1 Teaspoon Onion Powder
1 Teaspoon Salt
1 Teaspoon Pepper
1/2 Teaspoon Cumin
Olive Oil
Sugar
(You will also need extra salt, pepper and paprika for seasoning the sweet potatoes prior to roasting.)


Directions 
Preheat the oven to 350 degrees. While the oven heats, dice two large sweet potatoes into 1 inch chunks.

Drizzle olive oil over potatoes in a large bowl and sprinkle with an even mixture of salt, pepper, and smoked paprika. We use this seasoning mix for everything and keep a bowl of it handy next to our stove. You will also want to sprinkle approximately a teaspoon of white sugar on the potatoes to help them caramelize and blacken in the oven. Spread potatoes evenly on a cookie sheet and bake for approximately 35 to 40 minutes or until tender and blackened on some sides. Make sure to check the potatoes and flip them every 10 to 15 minutes.

While the potatoes cook, drain and rinse a can of cannellini beans. Mash one cup of beans lightly - I prefer to do this with a whisk but a fork or potato masher can also be used. You can also use this time to dice two cloves of garlic.

When the potatoes are finished roasting, dump them into the bowl with your beans. Mash together and then season with salt, pepper, smoked paprika, cumin and minced garlic. You will then want to add 2 tablespoons of nut butter and your flax egg - these ingredients help keep the burgers together but also add another deep flavor to the already smoky potatoes.

After the mixture is mashed and mixed thoroughly, add corn meal and flour and combine thoroughly. Then, allow the mixture to rest in the fridge for at least fifteen minutes.

While my mixture cooled, I took the time to make roasted garlic aioli (Trevor's mom was kind enough to get us a food processor for Christmas and we've been looking for every opportunity to use it).  I found it was the perfect sauce so if you'd like to make your own, I started with this tutorial and this recipe. Since Trevor isn't a fan of aioli, I cut the recipe in half and substituted sriracha for the cayenne pepper. Needless to say, I don't think we will ever buy store mayonnaise again.

Since I knew that I would be making my burgers slowly over the course of the week, I chose to make them on a cookie sheet lined with parchment paper. This recipe makes five reasonable sized burgers. You will want to work fairly quickly in shaping the burgers because the cold mixture stays together better but I really had no issues with the patties falling apart thanks to the nut butter I added. To store the burgers, I simply covered the cookie sheet and patties with plastic wrapped and placed it back in the fridge.

To cook your burger, you will want to use a pan over medium-high heat. I made the burgers two different ways - one plain, as is and the other coated in a mixture of corn meal, salt and pepper. Both versions were delicious so cook to your preference. Fill the pan with a thin layer of olive oil and heat thoroughly before placing your burger in the pan. The burgers should cook for 5-6 minutes on each side. The first time I fried the burger, I flipped it too early in order to keep it from blackening and found that it wasn't quite cooked throughly. That being said, don't be discouraged if your burger looks burnt on either side, it is important to fry each side for five minutes!


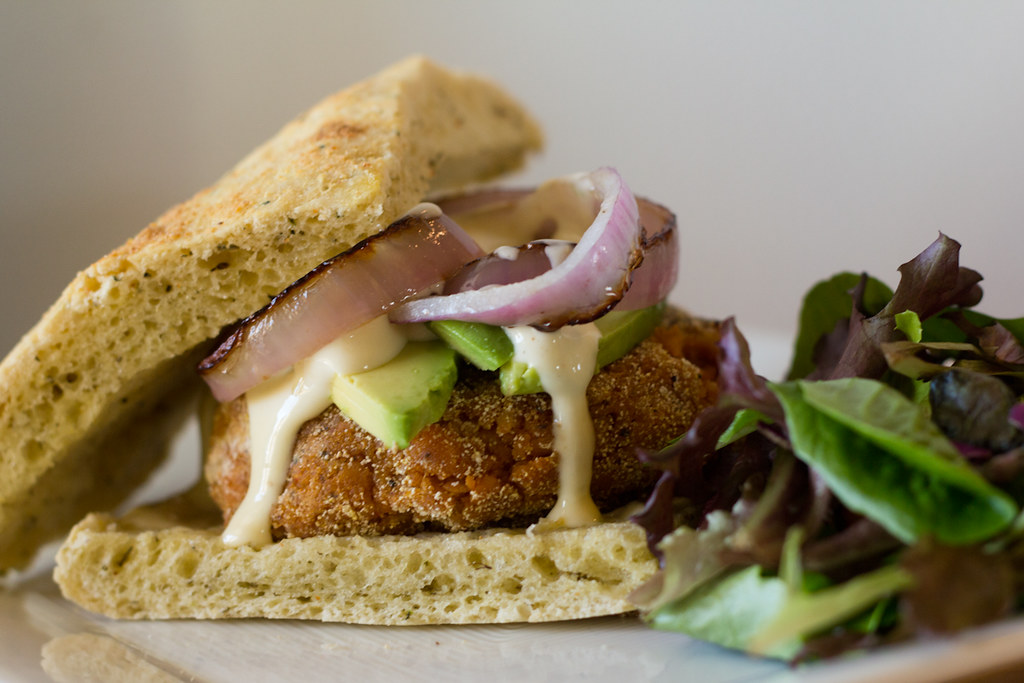
I chose to top my burger with avocado, caramelized onions and garlic aioli but the choices are endless. Perhaps some dijon mustard? Or sliced tomatoes? Even bacon would be delicious, though ironic. While I chose to put my burger on gluten-free focaccia bread, any bun will do. I've always enjoyed the burger on top of salad and last night, cooked, mashed and spread on toasted bread like hummus.

What can I say? I can't get enough sweet potatoes and these burgers are no exception.

Wednesday, January 9, 2013

WIAW | Winter Staples


I started off the new year with the best intentions. I scratched out goals - goals for myself, goals for this blog. One of those being to participate in each What I Ate Wednesday link-up, another being to write a weekly wrap-up post on Sundays. I had plans to review 2012 in a variety of ways. You'll have to forgive me for not getting to any of those things just yet. We lost our funny, sweet, baby boy last week and my heart has been too broken for any new goals, new blog posts or really much of anything. I've been trying to write about it, about my baby Scrap, for days but it hasn't yet worked itself out. So, I thought I would try to get back into the swing of things with a WIAW post. Easy enough, right?

While I spent the start of the year with camera in hand at dinner time, I don't seem to have the energy to download or edit photos just yet - you'll forgive me, won't you? Instead, here is a look at some of our winter staples via Instagram. If you'd like to see more of our past eats, you can see old WIAW posts here - or, you can check out this week's link-up on Peas and Crayons for more colorful, interesting winter meals.

On Christmas, we spent the day driving. When you spend the holidays alone, well, there isn't much else to do. We're quite thankful for that drive though since it brought us our new favorite "restaurant"in Montana. Just outside of our town is a road that leads toward "Wisdom, MT" but it also leads to the Mount Haggin Wildlife Management Area (a snowy dream in the winter) and the Sugar Loaf Lodge. The lodge serves multiple purposes - it houses travelers, it rents cross-country skis, it has its own gift shop of local Montana-made wares, and most importantly, it is home to the Soup Shack. Each week the cozy little cafe serves a few different homemade soups, each served with a thick slice of sourdough bread and whatever you'd like to drink (I'll take chai, please). And, they even make pecan pie! (one of these days, I'm going to cheat and have a slice). Since discovering our new favorite find, we've gone every weekend for a big, hot bowl of a soup and a look at the new snow.

At home we've been enjoying the same dinners over and over again. It has also seemed funny to me that avocados are ripe and plentiful during our winter. Thankfully though that has meant homemade tacos and nachos for weeks. I can't get enough guacamole so when avocados are available, we make the most of it. We try to keep things interesting with different toppings and combinations each week. So far we can't get enough.

We also recently discovered the best breading for gluten-free fried foods. With the ease of breading things, and the cheap ingredients needed, I can't believe that I went so long without trying it. I will post a recipe and tutorial, soon, but in the meantime, we will be busy enjoying breaded pork chops, homemade chicken nuggets and chicken parmesan.

Another dinner staple we've grown to love is risotto. I know that I already told you to make this recipe but it's so good that I have to say it again. We've been trying different varieties and my new favorite is italian sausage with spinach and tomatoes. I know that a lot of people struggle with risotto or look at it as time consuming or difficult but I've grown to enjoy making it. Risottos are gluten-free and easy to make without dairy, too. Plus they use few dishes and I happen to enjoy the slow-paced stirring required. If you have any great risotto recipes or favorite combinations, please share!

I promise we do eat more than dinner here but lately breakfast has been a struggle. Trevor can't have eggs or dairy, I shouldn't have oatmeal, and really, that leaves few options. We've been trying to pass off cookies and hot drinks as meals, instead. For Christmas we received a big box of gluten-free snacks and inside were the little gingerbread men you see above. I was nervous at first but now, I'm upset that I can't find them in Montana. My mom also tossed in boxes of chai tea and apple cider pods. While I've never liked hot chai lattes before, I seem to have fallen in love since Christmas - I can't get enough.

As for lunch, I'm on my own since Trev leaves by 5:30 and that has meant leftovers, macaroni and cheese, and my favorite - hot corn tortillas with ham and melted cheddar cheese. I wish I was kidding but those tortillas? I eat them daily.

Do you find yourself eating the same foods time and time again? We seem to rotate just a few basics with some variations. Lately I've started to look for more crock-pot dinners. If you have any recipes for quick, easy,  and gluten-free dinners - do share!

I hope to be back soon with stories of what we've been up to  but please excuse the quiet in the mean time.

Sunday, November 4, 2012

Recipe: Pumpkin & Chocolate Chip Oatmeal Cookies


On Friday night, Trevor and I planned to snuggled in to bed to watch yet another cheesy-supense-crime-thriller movie on Netflix - my favorite weekend activity. But before the movie started, photos from my flickr account played as a slideshow across the screen. While I was busy changing into long john bottoms and my favorite t-shirt, these cookies showed on the AppleTV. Trevor was quick to ask when I planned to bake cookies again - they're a baked goods staple in our house. With an empty weekend, void of any real plans, I promised to put it on my list.

The original cookies included peanut butter in the list, and so, while delicious, eating them made me sick. And really, who wants to bake a few dozen cookies when they shouldn't even enjoy one? So, I decided to skip the peanuts this time. Either way, I needed chocolate chips and so while Trevor dealt with our two overly-energetic pups, I snuck off to pick up a library book and to wander through the new Christmas aisles at Albertson's. Thankfully I left the store with just chocolate chips and Trevor's new favorite coffee. But lord knows if I could eat wheat, that new hot chocolate brownie mix would've been in my cart. (Someone please tell me you've bought made and enjoyed these? Oh, the temptation!) And holiday kettle corn? Drizzled with dark chocolate and tossed in sea salt? Ugh.
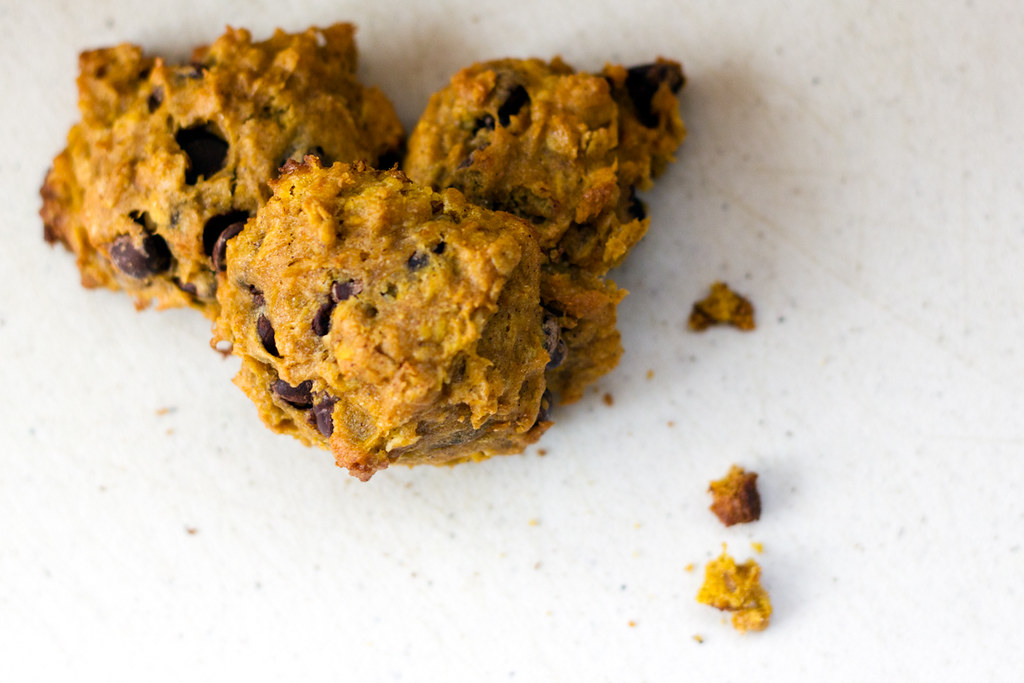
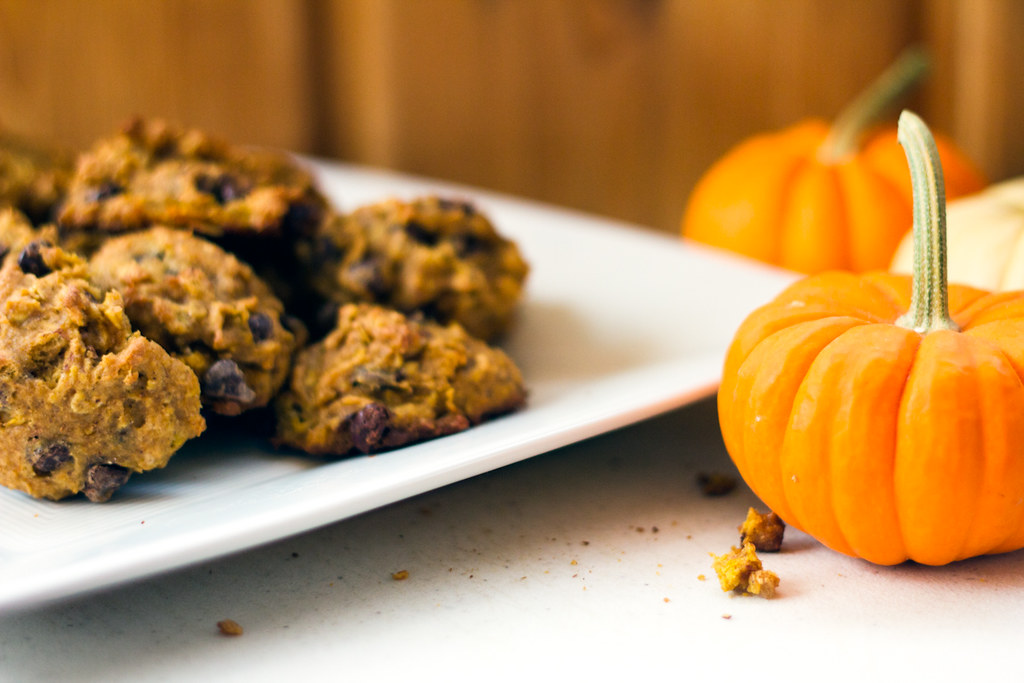
The entire store was filled with end caps of holiday favorites. Starbucks peppermint hot chocolate. Almond bark. Chocolate covered cherries. Coffee in christmas flavors. Snowflake sprinkles. Red and green cupcake wrappers. It took me nearly a half an hour to buy two things, my mind was so distracted by the holiday sparkle.

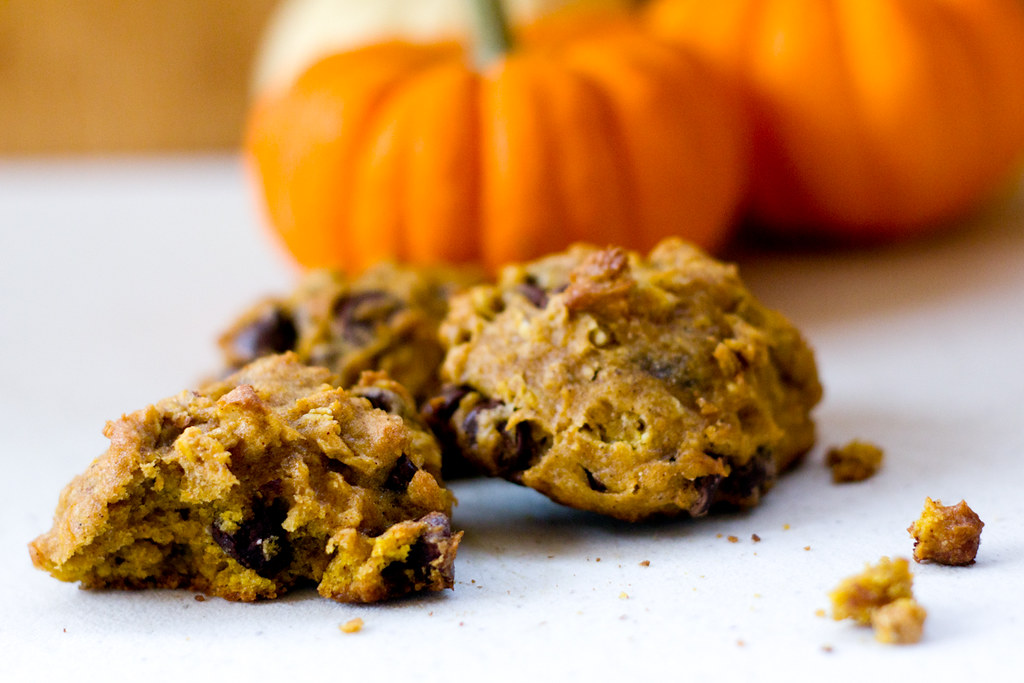
Unfortunately, it's only November though. And so while I'd love to start the Christmas music and hang our stockings, I think Trevor would prefer I wait at least three more weeks. So, I decided to spend my afternoon making autumn inspired treats, including these Gluten Free Pumpkin & Chocolate Chip Oatmeal Cookies. (A mouthful, I know.)


To be honest, these didn't turn out to be the same type of cookie as their peanut butter counterparts but that didn't mean they were any less delicious. In fact, I think I enjoyed these more - perhaps because they didn't give me migraines? Imagine that. While the others were rolled and baked into perfect puffy circles, this dough needs to rest in the fridge before being dropped onto the pan - meaning that they are textured and imperfectly shaped.

The pumpkin flavor is subtle but makes for a thick, chewy, cookie. Trevor ate three or four, never realizing they were pumpkin. Note though, they are bright orange in the center - it's hard to miss. These also boast some warm autumn spices and a lot of vanilla, flavors that seem to go naturally with pumpkin. The oatmeal softens in the cookie but tends to keep its texture toward the outside, giving the cookie an even better chewy-ness. And the chocolate chips? The perfect touch of sweetness to a cookie that itself is not overly sweet. I used ghiradrelli semi-sweet, you should probably do the same. 


This is a hearty recipe and makes plenty of cookies to share - about three dozen.

Ingredients
1 cup of Bob's Red Mill Gluten Free All Purpose Baking Flour
1 1/2 cup of white rice flour
(feel free to substitute 1 1/2 cups of any gluten free flour mixture or even regular flour)
3/4 tsp xanthum gum
1/2 tsp of baking soda
1 tsp of cinnamon
1 tsp of pumpkin pie spice
A pinch of salt
3/4 cup of brown sugar
1/4 cup of white sugar
3/4 cup of butter (softened)
1 egg + 1 yolk
1 cup of pumpkin puree
1 3/4 cup of certified gluten free rolled oats
1 tablespoon of vanilla
1 cup of chocolate chips

Directions
Preheat the oven to 350 degrees.

In a medium mixing bowl, combine both flours, both sugars, xanthum gum, baking soda, salt, cinnamon and pumpkin pie spice.
In a large mixing bowl, beat the egg and extra yolk.
Add the butter and vanilla.
Mix in the pumpkin puree.
Then, dump the dry ingredients into the wet, mixing until combined.
Add the rolled oats and chocolate chips.

Cover the mixture with plastic wrap and let rest in the fridge for 30 - 40 minutes.
Then, after cooled, use a spoon to drop cookies onto a greased pan.
Bake for fifteen minutes or until the cookies are golden on top - careful not to over bake.

These cookies stay nice and soft, even after they've had time to cool - even the day after. While Trevor likes them best with a cup of french roast, I've been enjoying them with some spiced chai. Unfortunately, the other two house members have taken an interest in the cookies, too, so we have to make sure they're kept out of puppy reach.

Tuesday, October 30, 2012

Ten on Tuesday: Great Food in Santa Fe

With snowy weather settling into Montana, likely for good, I've found myself spending far too much time browsing for winter flights to somewhere warm and sunny. As you know, I spend most of the year with a severe cast of wanderlust. Though I have a soft spot for Arizona, I think Trevor's heart will always be in New Mexico, a place that he once called home. After last week's collaboration for some great halloween flicks, we thought we would try it again. So, this week, we're bringing you a list of ten great restaurants in and around Santa Fe - our personal cure for the traveling blues. Whether you're an experienced traveler or looking to plan your first cross country trip, Santa Fe is a great place to start - especially if you're a fan of great food.

Though many vacation locales claim to have many fabulous restaurants, Santa Fe is unique in that all of the restaurants listed below are locally owned. While each has its own unique specialities, all feature an impressive menu. That being said, the interior and decor might not be what you expect. As Trevor would say, great food comes from great food. Here, in no particular order, are his ten favorite places to eat in and around Santa Fe:


1 // La Boca is a Spanish tapas restaurant that can hardly be compared to any other, and this comes from a man who loves tapas. Chef/Owner James Campbell Caruso not only prepares authentic spanish dishes but he does so with fresh ingredients provided by the Santa Fe Farm to Restaurant program. Though some of Santa Fe's culinary claims lack in decor, La Boca features a compact, quaint and cozy atmosphere with a great wine selection. Curious yet? Check out the menu here.

2 // Vinaigrette features locally grown ingredients, as well; but, rather than employing an outside farm, during the peak season, owner Erin Wade provides seventy percent of the bistro's produce from her own 10-acre farm. As Trevor would describe it, "Just go. I could tell everyone how great the multitude of fresh and vibrant salad combinations are but I'll never do it justice." In addition to great fresh salads (with ingredients like diver scallops and lemon-herb chickens), Vinaigrette also offers patio seating, and a dozen salad-friendly wines.

3 // Dinner for Two always features a great fresh fish entree created by Chef Andy Barnes, a New Mexico native. Like other Santa Fe restaurants, Dinner for Two also works with the Farm to Restaurant Project. Perhaps the best part, though, is the fresh made dinner bread baked just before service each day.

4 // Bobcat Bite is known for what Trevor insists is the world's best green chile bacon cheeseburger, and like I've said before, that boy loves his green chile. (He may be on to something though, the restaurant and it's burger have been featured in all kinds of magazines, and was even on Food Network!) While Santa Fe has plenty of downtown restaurants, Bobcat Bite is off the beaten path on Old Las Vegas Highway. Make sure to get their early, as the historic building features limited seating. Trevor suggests that upon arriving, writing your name on the board and get ready to enjoy the juiciest burger of your life.

5 // Zia Diner is a staple of the Santa Fe food scene. Typical of any diner, the Zia has a large menu full of classic diner cuisine, but also authentic New Mexican. That being said, the quality goes above and beyond any basic diner, the Zia uses grass-fed, additive-free beef and free-range chicken and eggs - plus, the menu is marked for gluten free options. While visiting Santa Fe a few months ago, Trevor made sure to make a trip to the diner for his favorite breakfast, heuvos rancheros and local, organic, fair-trade Agapao Coffee. In addition to offering classic diner fare, the Zia also has a bar behind the main dining room and a wide variety of drinks.

6 // The Red Enchilada serves breakfast, lunch and dinner, all with classic New Mexican dishes. As Trevor simply put it, "So simple. So good. Huevos rancheros with red chile? Wow!" If heuvos rancheros aren't your thing as they certainly aren't mine, this Santa Fe favorite also offers classics like pupusas and enchiladas.

7 // Tribe's Coffeehouse is home to the biggest, heartiest sandwiches in south side Santa Fe. Served on the freshest locally baked bread, they're made with the best meats and cheeses and the freshest of vegetables. On top of that, the coffeehouse features the best homemade soups. If breakfast is more your thing, Tribe's also offers a large selection of New Mexican dishes - not to mention they also feature the best hot or cold coffee and espresso drinks.

8 // Santa Fe Baking Company is a quirky place to grab a quick and delicious breakfast - with entrees like Steak and Eggs, Trevor's favorite. For lunch, the cafe serves up tasty sandwiches, along with more traditional southwestern fare.

9 // Michael's Kitchen is located outside of Santa Fe in the town of Taos. As soon as you walk in, the homemade baked goods and pastries will catch your eye - that is, if you don't spot a celebrity first. In addition, Michael's Kitchen also offers an extensive menu with breakfast, lunch and dinner. Trevor suggests the Stuffed Sopapilla filled with beans, cheese, onions, and ground beef. Trevor's favorite part, though?  Topped with green and red chile. Want to try it his way? Just say "Christmas", the locals will know what you mean.

10 // Frankie's Casanova is another perfect choice for breakfast - try the pinon nut pancakes or a breakfast enchilada. The atmosphere adds to the experience with a bar that looks like it is straight out of the wild west. Plus, it's in the scenic little town of Pecos, 25 miles north of Santa Fe.


So tell us, is good food part of your travel itinerary? What's your favorite town to eat in? 

Saturday, October 13, 2012

Gluten Free Apple & Almond Crisp


As the weather cools, we've found ourselves in the kitchen more. It's a mix of things, really - the nights are getting darker earlier, we've been craving fall flavors, and the heat of the oven helps to warm the house against the Montana fall. The long weekend passed by slowly as Trevor fought with a sore back and the start of a flu and on Columbus Day, I found myself itching for something to do. We had woken up early - it was still dark and still cold. So, armed with a few leftover apples and some Udi's Granola, I decided to make apple crisp for breakfast.

Our weekly grocery shopping had been pushed back a day and so every ingredient used for the recipe was already in our home. If you don't have prepackaged granola, feel free to make your own with some old-fashioned or quick cooking oats! While apple crisp is typically made with more tart, baking style, apples, we used what we had and red delicious are Trevor's apples of choice. Though the almonds added an extra crunch, you can omit them or replace them with other nuts - pecans would be especially good!

This recipe will make a smaller batch, a 9x9 glass dish full. This was perfect for breakfast and later, dessert, for both of us. But, if you need a bigger batch, double the recipe and use a 9x13 pan!

Ingredients
4 Red Delicious Apples, peeled and sliced
1/4 cup and 1 tbsp of Gluten Free Bisquick (or regular all purpose flour)
1 tsp Cinnamon
Pinch of Nutmeg
1 tbsp White Sugar
1/4 cup of Brown Sugar
2/3 cup of Udi's Gluten Free Au Naturel Granola
1/4 tsp of Baking Powder
1/4 tsp of Baking Soda
6 tbsp of Brown Butter 
1/3 cup of Sliced Almonds

Directions
Preheat oven to 375 degrees.
Grease a 9x9 glass baking dish.
Lay apple slices evenly in the baking dish.
Sprinkle apples with 1 tbsp of white sugar, 1 tbsp of Bisquick, 1 tsp of cinnamon and a sprinkle of nutmeg.
In a small mixing bowl, combine the remaining dry ingredients.
Then, brown your butter. (This was my first time but I followed this great tutorial from Hot Sweet It Is.)
... how have I not mentioned my obsession with this food blog? 
Combine the butter with the dry ingredients; then sprinkle the topping evenly over the apples.
Bake for 30 minutes or until apples are fork tender and the topping is golden.


For Trevor's breakfast, I put the hot apple crisp over cinnamon and vanilla gluten-free pancakes, our favorite. The crisp itself wasn't overly sweet so the addition of a little maple syrup was perfect. I chose to have the more classic preparation - I simply poured some cream over the crisp. Served with a piping hot cup of coffee or cocoa, this was the perfect fall breakfast.

I'll be back tomorrow to tell you all about autumn in our little home. It includes plenty of pumpkins, that wreath I told you about and well, we got a puppy.


So tell me, what is your favorite fall breakfast? 


Monday, September 3, 2012

Recipe: Back to School Breakfast

I spent the first fifteen years of my school career at schools which began their fall classes prior to labor day. But here, in Anaconda, school starts tomorrow. Furthermore, this week marks four long (and early) days of work for Trevor and I, both.

This time of year is always recharging for me - especially when the temperature begins to change. I find myself organizing, cleaning and preparing myself for the busy season that fall seems to be. Today, I spent the day cooking ahead for the week, reorganizing pantry shelves and dishes, and with Trevor’s help, cleaning the house from top to bottom. Unfortunately, our list of “to-do’s” still isn’t finished but I’m feeling ready to take on the next few days.

I find that one of the biggest struggles with the busyness of this season (with its piles of school work and necessary packed lunches) is eating healthy. With early mornings and late nights, it’s easy to fall into the habit of eating out, grabbing fast food, or snacking all day - especially for those of you who don’t have to eat gluten free.

Throughout my public school career, I rarely ate breakfast. I didn’t eat eggs until well into my teenage years. Pancakes? Only with chocolate chips. Cereal? Occasionally. I didn’t find a morning meal necessary until late in high school, particularly after adopting an allergy-friendly diet. Being on a gluten free diet means consuming less carbs and for me, that means eating more often.

While cereal is a quick and easy breakfast, I find that it typically makes me not feel well - and within an hour or two, I’m hungry. With access to gluten-free bread and a microwave, my usual breakfast was an egg, sausage and cheese sandwich. Then there was the baked oatmeal. And now? Mini quiche and cornbread muffins - gluten free, healthy, pre-portioned, and easy to reheat in the oven.


Mini Crustless Quiches
This recipes makes 1 dozen servings.

Ingredients
Shredded Cheddar Cheese
1/4 Cup of Corn Starch
3 Large Eggs
2 Egg Yolks
1 1/2 Cups of Milk
1/2 Red Bell Pepper, minced
1/4 Large Red Onion, minced
4 Slices of Bacon, diced (uncooked)
Baking Spray
Black Pepper
Salt

You will also need foil cupcake liners. 

Directions
Preheat oven to 450 degrees.

In a medium pan, saute diced bacon over medium heat.
While the bacon fries, mince the red onion and pepper - when finished, add to the pan. 
Sautee until the bacon is finished cooking.

In a large mixing bowl, whisk together the eggs, additional yolks and corn starch.
Add in milk and continue whisking.
Add salt and pepper to taste.

Place foil cupcake liners on a cookie sheet or in a muffin pan.
Spray thoroughly with baking spray.
In the bottom of each liner, sprinkle a generous helping of cheddar cheese.
Then place a spoonful of bacon/pepper/onion mixture in each cup.
Pour egg mixture over the top until the liners are 3/4 or more full.

Bake until the quiches are firm and start to brown on the top. (20 minutes or more)

This is a basic recipe that can be altered with different fillings and cheeses. Try ham or sausage. Add mushrooms or fresh basil. I simply used pantry items that we needed to use up in our fridge. After baking, leave the quiche in the foil liners for easy reheating in the oven. For microwave use, this is not required - feel free to bake straight in a muffin pan. 

Gluten-free Cornbread Muffins
This recipes makes 1 dozen muffins.

Ingredients
1 Cup of Corn Meal
1 Cup of Gluten-free Bisquick (or another gluten-free baking flour with xanthum gum or regular wheat flour)
4 Tsp of Baking Powder
1/4 Cup of Sugar
1 Tsp of Salt
2 Eggs
1 Cup of Milk
1/4 Cup of Melted Butter

Directions
Preheat oven to 425.

Sift bisquick with sugar, baking powder and salt.
Add in the corn meal and stir until evenly distributed.

In a separate bowl, lightly whisk the eggs.
Add the milk and melted butter, whisk until combined.
Add in the dry ingredients - stirring just until moist.

Once again, you want to use 12 foil cupcake liners and spray them with baking spray.
Bake for 15 - 20 minutes, or until a toothpick comes out clean from the center of the muffins.

Once again, if planning to reheat in the oven, I suggest leaving the muffins in their foil wrappers. For microwave heating, this is not necessary - feel free to bake straight in a muffin pan or using paper liners.


These recipes do not create large serving sizes which makes them great for children headed back to school or when you’re eating an early lunch like me (11? really?). To make for a more substantial and well rounded breakfast, we chose to add a slice or two of bacon and some fresh pineapple but I know you’re creative people.

Overall, this took less than an hour and a half - with plenty of time for cleaning the kitchen and cutting pineapple - and provided us with hot breakfast for the entire week. Even if you’re not headed back to school, this is a great way to eat healthier while working full time. Truth be told, I simply couldn’t take another morning of watching Trevor eat generic-brand fruity pebbles.

What are your favorite make ahead or quick breakfast recipes? 

Wednesday, August 15, 2012

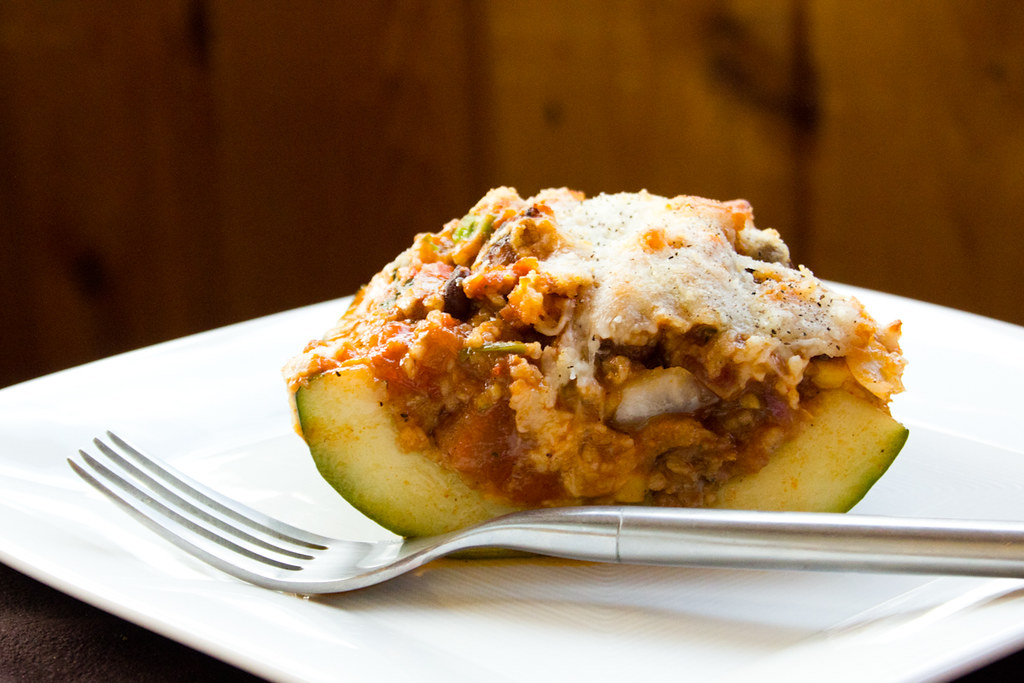
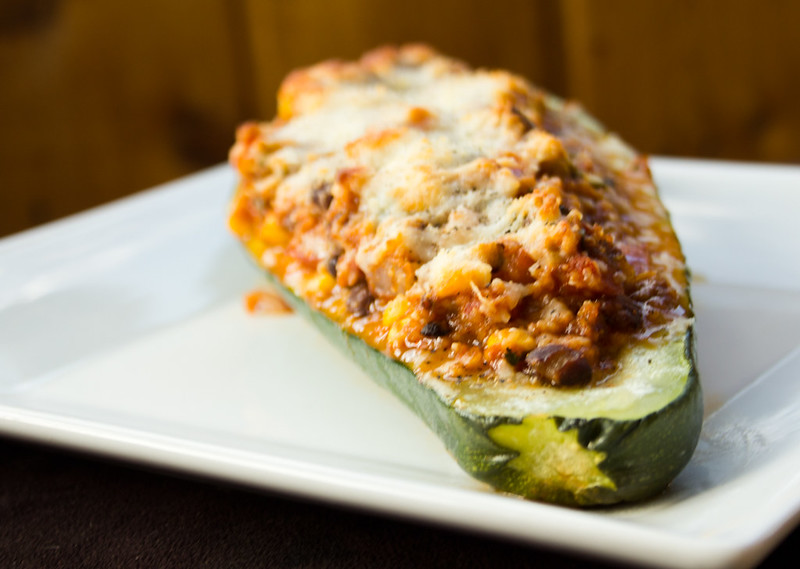
WIAW: Southwestern Stuffed Zucchini


I wouldn’t be exaggerating if I told you that we had eaten chili with every meal since Trevor returned home from New Mexico. This has meant heuvos rancheros, green chili chicken enchiladas, homemade salsa, vegan and gluten-free green chile cornbread, and green chili chicken corn chowder. (I know, I know. I should’ve photographed the southwestern food feast but I was too busy drinking Gruet to cool my overly spicy mouth). While I love all things involving chile, avocados, and corn tortillas, even I have reached my breaking point on the chile... though I suppose you could say that those three things have become summer staples around here.

I even snuck away from the house today to buy a Snickers bar and eat it in peace.

But, back to the point of this story. In Montana, zucchinis are in season and after an evening sitting on the new deck of our good friends’ house, Michelle sent us home with one grown from her dads garden (That sounds familiar, huh?). Today, while out sneaking in a Snickers bar, I figured I should buy something at the store other than Diet Dr. Pepper and candy so I grabbed some sausage and tomatoes thinking that I would finally conquer stuffed zucchini. After all, we had brown rice cous cous, tomato sauce, italian blend cheese, parmesan, oregano, fresh garlic, and white onions at the house already.

Well. That was the plan before Trevor hijacked dinner.


Instead of my cheesy italian style dinner, we ended up with another meal thoroughly soaked in homemade red chili sauce. It was delicious so I’m trying not to complain but even this obsessive eater is ready for a little variety.

But, since it was both delicious and beautiful, I thought I would switch it up for this week’s What I Ate Wednesday and share with you the recipe that we had for dinner tonight (and the recipe for the homemade salsa we used).

Salsa Ingredients:
2 avocados, diced
1/2 red onion, diced
1 tomato, diced
1 1/2 cups of corn (you can use canned, frozen or off the cob)
1 can of black beans (freshly prepared or canned)
1/3 cup of Hatch green chile (optional)
2 cloves of garlic, minced
1 Lime
Salt
Pepper
Fresh Cilantro
Cumin

Mix the above ingredients and toss in the juice of one lime until everything is evenly coated. Then, you’ll want to add salt, pepper, cilantro and cumin to taste. We love ours with a lot of kick from the cumin but that’s up to you! The longer this salsa sits, the better it tastes - but make sure to cover it tightly with plastic wrap because of the avocado browning. We’ve used this with our enchiladas, in breakfast burritos, with tortilla chips and finally, in the stuffed zucchini. It’s versatile and chunky with a bit of sweetness and cool flavor from the corn.

Needless to say, the salsa is mostly allergy friendly (feel free to drop the corn) and vegan!


As for that zucchini...

You’ll need:
1 large or 2 small zucchini
2 cups of cooked cous cous, rice or quinoa (like I said, we used a gluten free brown rice cous cous)
1/2 pound of sausage (feel free to substitute chicken, steak or leave it out for a vegetarian dish)
1/4 of a white onion, diced
1 tomato, diced
2 cloves of garlic, minced
1 1/2 cups of salsa
1 cup of red chili sauce (we made ours homemade but feel free to use enchilada sauce if red chili isn’t available)
Shredded cheese
Salt
Pepper
Olive Oil

To make:
Preheat the oven to 400 degrees.
Slice the zucchini down the center and scoop out the flesh with a spoon. (See top photo.)
Coat the zucchini with olive oil and aggressively season it with salt and pepper.
Wrap the zucchini tightly in foil and place in the oven on a baking sheet.

The zucchini should be ready to stuff in approximately forty minutes so while it bakes:

Prepare the cous cous or rice if you haven’t already.
Sautee the sausage, onions, garlic and tomato.
In a large mixing bowl, combine the sausage mixture with the cous cous, salsa and sauce.

When the zucchini is tender, take it out of the oven and fill it with this mixture. Top with shredded cheese of your choice and bake until the cheese is melted and browned on the top. Sprinkle with black pepper, allow to cool and slice into sections to serve. 

How was it?
Despite my frustration at my dinner plans being thrown out in favor of a spicier version, this turned out to be a really great filling summer recipe plus, it’s very healthy! If you use a gluten-free grain, the recipe is wheat free. Without meat or cheese, it’s also vegan (but check your enchilada sauce!) and I’m sure it would be just as delicious! Our friend Michele can no longer eat eggs, wheat or milk and so making allergy friendly recipes has become even more important. As you can see, this recipe is obviously an easy way to please those with and without food restrictions and still remains robust and zesty. Plus, it’s pretty healthy. Overall, we were really happy with the way it turned out and thankful that we have more than half of our prepared zucchini left.. plus a cup or two of filling. We’re thinking stuffed peppers are in order.

So while it might not be much, that’s what we ate this Wednesday.
How about you? Are you a fan of spicy food or southwestern cuisine?

Thursday, August 2, 2012

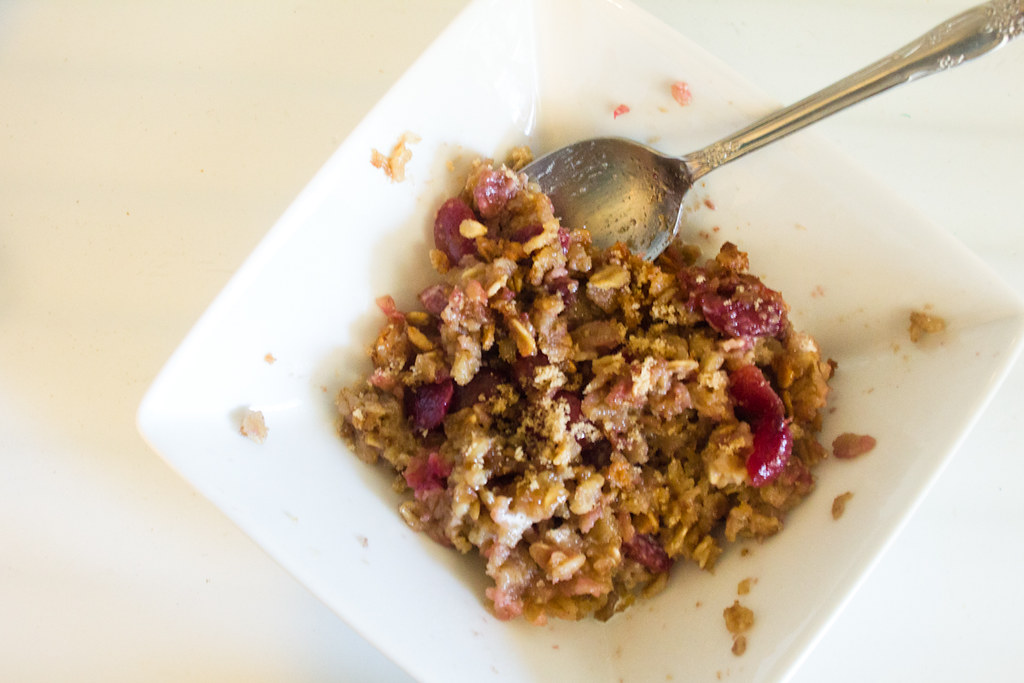
Recipe: Baked Sweet Cherry Oatmeal

It’s hard to imagine that today marks the second day of August. Of all the seasons, summer seems to come and go the quickest - and with the beautiful weather of Montana that statement is all the more true. With a full course schedule and a possible return to Pennsylvania looming (and the internship I start next week!.. more about that later), I’ve started to feverishly scribble to-do lists and mini-vacation plans into the brown paper journal that never leaves my side. I’m aching for a summer fair and after watching this video, I’m sure you will be too. Nothing signifies the end of summer quite like sticky cotton candy fingers and the bright lights of spinning and twirling carnival rides. (Plus, a little bird told me that the fair is coming to Missoula next week and I’ve already sent approximately 54 text messages to Trevor begging that we go.) But, I digress. 

The point is - there are certain things that will always mean summer to me. And while country fairs and swimming holes are two of those, sweet cherries are another. Summer time is perhaps the only time when these delicious babies make their way into my budget and onto my grocery list. After spending a few hours coupon clipping, loading savings to my shoppers card, and scratching our weekly list into my notebook, Trevor and I headed to Safeway for our weekly argument over what to buy. While he was busy sneaking a party size bag of Peanut M&M’s (42oz. I kid you not.) into our cart, I was wavering on what greens to buy (I’m a spinach girl. He likes spring greens) and that’s when I saw them.

Sweet cherries - $1.99 per pound.

I dug through the bags to find the one with the crispest, brightest cherries and turned to Trevor with puppy eyes. After all, this girl has no job and that means begging for cherries. Thankfully, I’m spoiled and Trevor said of course as he tossed them in the cart. (Though I didn’t get the Dairy Queen I wanted.. )

We had barely gotten the groceries unloaded before I had filled a stainless steel mixing bowl with a pile of cherries. As, Trevor worked on his homemade balsamic dressing.. I ate. and ate. and ate. cherries until my lips and fingers were stained pink. Thankfully, someone in this house had enough sense to push a turkey and cheddar salad beneath my hands before I filled my stomach with fruit. (As for the greens? We got both - we’ve been eating a lot of salad around here.)


While I love cherries for their taste and texture and how perfectly cool and refreshing they can be, I think my real love is because they remind me of my grandmother. I don’t know that we ever had cherries in my house growing up. But every time I’d visit my grandma (which was often), there were cherries to be eaten. I feel the same way about fresh peeled potatoes (and eating them raw) and stale marshmallow peeps - I think that I could eat them until I’m 92 and still think of my grandmother.

Though it had been 92 degrees in the shade on our way to the grocery store, I had made a note-to-self to grab ingredients for baked oatmeal. Oatmeal seems to be my food of choice lately and I’d never had the baked variety - though the diner I worked in as a teenager always sold it. I’d also seen this new fad of overnight oats sweeping through the food blogosphere and thought that I could kill two birds with one stone.

Then, I woke up today with the best of ideas: Baked Sweet Cherry Oatmeal.
And now? After eating it? I still think it was the best of ideas.


If it’s too warm for you to be eating hot oatmeal for breakfast, I have to say that it’s a delicious snack served cold. And, topped with french vanilla ice cream? Then you’ve got dessert. Personally, I’ve eaten it all three ways today and it’s only mid-afternoon.

If you want to make some for yourself (and I know that you do), here’s what you’ll need:

Ingredients:
3 cups of old-fashioned rolled oats (if you’re gluten-free, make sure you buy oats that are certified GF)
1 1/4 cups of brown sugar
2 tsp baking powder
1 tsp kosher salt
1/2 tsp cinnamon
2 eggs (or for allergies, 1/2 cup of applesauce)
1 cup almond milk (though you could make this recipe with cow’s milk or soy milk)
6 tbsp butter, melted
1 1/3 cup sweet cherries (or another type of fruit, if you prefer)
1/2 cup whipping cream (can also be replaced with the milk of your choice)
1 tsp vanilla

Directions:
Preheat the oven to 350 degrees.
Grease a container of your choice - I used a glass pie dish but an 8x8 or 9x9 baking dish will work, as well.

Remove the pits from your cherries and roughly chop them - saving a few halves for the top.
Melt your butter in a saucepan over medium heat.
In a large mixing bowl, while the butter melts, lightly wisk two eggs.
Add melted butter, baking powder, salt, cinnamon, brown sugar and vanilla to the bowl.
(At this point, I recommend tasting the mixture to see if you need more cinnamon or sugar for your tastes - I originally began with 1 cup of brown sugar and added the extra 1/4 cup because I like my oatmeal sweet.)
Add oats, almond milk and cream - mix thoroughly.
Then, fold in your chopped cherries.
Pour the mixture into your dish and neatly place the remaining cherry halves on the top.

After completing these steps, your oatmeal should look like this:


While this may look unappetizing, I wanted to include a “before” photo to comfort you after you mix all the above ingredients together and panic, for a moment, thinking that it is much too wet. It’s not. The oats soak up the moisture as it bakes (I was nervous too, especially since this is my first shot at baking from scratch at a high altitude.)

For low altitudes, I recommend baking for forty-minutes at 350 and checking to see how the oatmeal looks. I found that I baked my oatmeal for nearly an hour and fifteen minutes to get it to the texture that I wanted. Not to worry though, if you leave it in longer - it won’t burn. Simply check it at 45 minutes and then in 10 minute intervals until your oatmeal looks like the one pictured above the recipe. It should be thick and spongey with a glossy texture on the top.

When you take this out of the oven, it can be served right away! Like I said, it’s also great cold.. In fact, I’ve got the entire pie dish sitting next to me as I munch and type, at the same time. The best part of baked oatmeal is that it can be easily cut apart and reheated for breakfast throughout the week - I like mine with a splash of almond milk and a sprinkle of brown sugar. 30 minutes of prep time on a Sunday will yield you a healthy, yummy, sweet breakfast for busy mornings before work, school, the gym - whatever you might be doing. Plus, it also makes a great late night snack to satisfy your sweet tooth!


I’m planning to make this a weekly habit. Next time with fresh peaches and cream, perhaps!
What are your favorite mix-ins for oatmeal? Have you ever tried overnight oats? 

Monday, June 11, 2012

Chocolate Covered Strawberry Cake


Here in Pennsylvania, tiny, ripe, local strawberries are one of the signs that summer has come (though the crop was a bit late this year). When I was invited for dinner with my boyfriend’s family, I realized that I should probably bring a dessert and after serving local strawberries with Grand Marnier whipped cream at the Blue Heron all evening, I thought strawberries would be the perfect theme. Unfortunately, this thought came to me at ten o’clock on a Saturday night and most of our local strawberry growers refrain from doing business on Sundays.. so there I was, at Price Rite, buying strawberries after work.

Before you dive into this recipe, I must warn you that it is a bit time consuming - but I found that it was manageable when split over two days time. For this version, I used an 8-inch spring form pan and a gluten-free yellow cake mix - I then torted the cake into three thin layers. You could easily create this recipe using standard 8-inch cake pans but I would recommend slicing each pan into two layers and using an extra layer of filling. You can obviously chose a non-gluten free cake mix in yellow, white, or even chocolate, for your preparation! I highly recommend baking the cake the night before you need it, and if using a spring form, to let it cool in the pan overnight. A cool cake is the key to nice smooth layers, especially when baking gluten-free!

But enough about that, let’s get to the important part - strawberries and chocolate. Inside the cake, you have two fillings - glazed berries and a chocolate strawberry whipped cream. Outside, a pink tinted buttercream and a coating of chocolate ganache. I will walk you through the ingredients in the order that I prepared them.


Glazed Strawberries
While I made these the next morning, you could easily prepare this filling while your cake is baking.

You will need:
2 1/2 Cups of Strawberries
1/4 Cup of Sugar
1/4 Cup of Water
1 Tablespoon of Corn Starch

You will need two cups of thin sliced strawberries - you can prepare them before starting the glaze, or while it is cooking, if you like to multitask!

For the glaze:
Dice strawberries until you fill a 1/2 cup measuring spoon.
Put the strawberries into a small saucepan and crush them with a fork.
Add 1/4 cup of water to the pan and place it over medium heat.
Cook this mixture for two minutes and remove from heat.
Pour the mixture through a strainer and collect the juice in a small mixing bowl.
The remaining crushed berries can be thrown away, and the juice poured back into the pan.
Mix 1/4 cup of sugar and 1 tablespoon of corn starch with a bit of warm water to make a rue.
Mix the rue into your strawberry juice mixture.
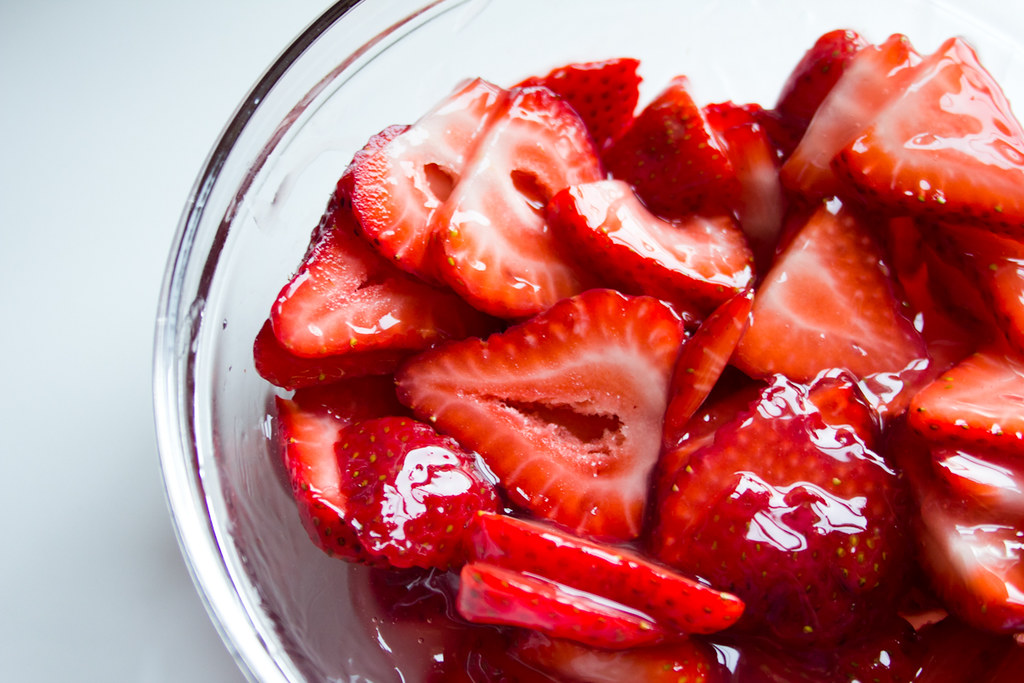
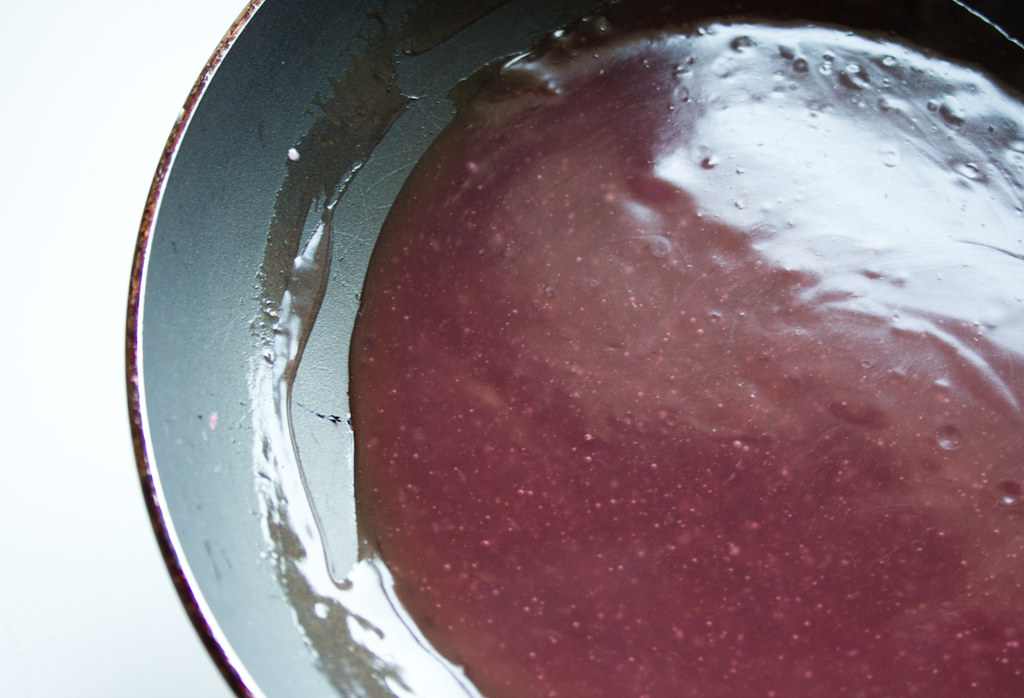
Cook until thick and clear. (See below)


Make sure to stir almost constantly while the mixture is thickening so that it cooks evenly. Once it reaches the above consistency and color, remove it from the stove and allow it to cool slightly. After the glaze has had a chance to cool, pour it over your two cups of sliced strawberries. This mixture will form the filing to your cake. In my case, I had plenty left over which made a great breakfast over pancakes today. I almost imagine it’d make a good ice cream topping.


Chocolate Strawberry Whipped Cream
I have made this recipe previously as a simple strawberry whipped cream and it was to die for - so feel free to exclude the chocolate if you would like!

You will need: 
1 Cup Heavy Whipped Cream
1/3 Cup Sugar
1 Tsp Vanilla
5 - 6 Tablespoons of Chopped Strawberries
Cocoa (to taste)

Chop your strawberries into very tiny pieces. You can do this by hand or with a food processor.
Beat the heavy cream and vanilla until it begins to thicken. I use a hand mixer at high speed.
Add in the sugar. Continue beating until it reaches the consistency you’d like.
Sprinkle in cocoa powder (no more than 1tsp at a time) and beat. (Do this to taste.)
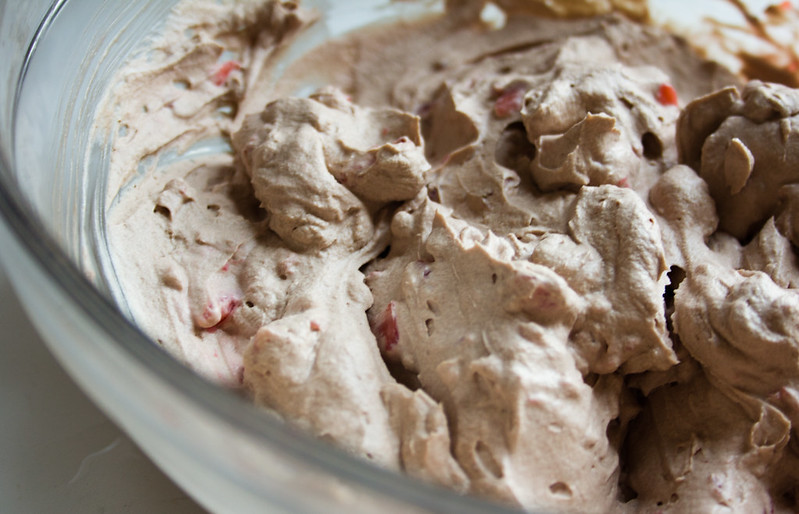
After the whipped cream is down, fold in your chopped strawberries.

Keep the whipped cream refrigerated until you are ready to fill your cake. I don’t recommend making the whipped cream the night before, especially during the humid, hot, summer.


Buttercream Frosting
If you want to make your frosting from scratch, I recommend using a “quick” buttercream.

You will need: (per batch)
3 Cups of Confectioners Sugar
1 Cup of Butter (softened)
1 Teaspoon of Vanilla
2 Tablespoons of Milk
Food coloring (optional)

Using a hand mixer, beat the butter until it is light and fluffy.
Add the sugar and beat for three minutes.
Add vanilla and milk and beat on a medium speed for a minute.
Add food coloring to your preference - start with one or two drops.
Beat on high speed for three minutes.

I find it helpful to take a bit of the icing and add extra milk so that you can crumb coat your cake more easily.

At this point... You’ll want to put the cake together. I did so in the following way:

Take your bottom layer of cake and spread a very thin layer of icing (crumb coat texture, if you have it) across the top. Then, pipe a ring of icing around the rim of the circle - you can use a ziploc bag with a hole in the corner. This helps your filling from oozing over the sides of the cake and into your outside icing. I filled the first layer with whipped cream. Repeat the icing steps for your next layer and then add the glazed strawberries. Make sure you make the filling layers even so that your cake will not lean. Finally, add the top cake layer and coat the entire cake with a crumb coat of icing. Then, take your thicker buttercream and ice the cake. I have found that it works well to place the cake (still attached to the spring form bottom) on a bowl to help with icing the sides of the sake. I then used the back of the chef’s knife shown below to smooth the sides and top - run it under cool water every few “swipes” to give the icing a smooth finish. I put the cake in the fridge while making the ganache so that everything had a chance to cool and settle into place.


Chocolate Ganache
This is perhaps my favorite part of this cake - especially because I used the extra ganache to make chocolate covered strawberries, yum.

You will need:
4 oz. of Bittersweet Chocolate
(I used a Ghirardelli baking bar for my chocolate and kept 1 square out for decoration.)
1/2 Cup of Heavy Cream
1/4 Cup of Light Corn Syrup
2 Tsp of Vanilla

Chop your chocolate into small pieces as shown above.
Place the chocolate in a medium size mixing bowl.
Heat cream over medium heat until it begins simmering.
Pour the hot cream over the chocolate and whisk until smooth.
Then, add the vanilla and corn syrup and continue to mix.

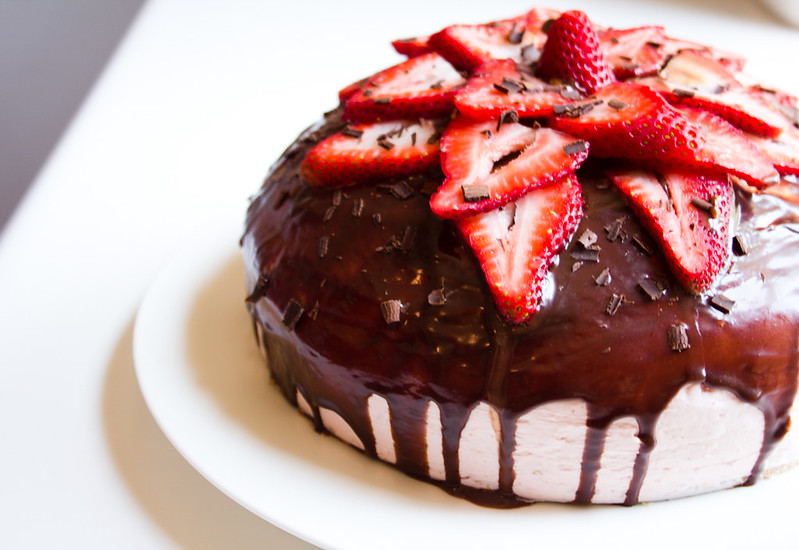
You will want to allow the ganache to cool for a few minutes before pouring it over your cake. To get dripped edges, start in the middle of the cake and adjust accordingly.

For decoration:
I simply sliced strawberries length wise and placed them in overlapping circles around the top of the cake. I then used the end piece of strawberry for the middle.

To make chocolate shavings, I simply used a vegetable peeler to shave the Ghirardelli square.


Overall, I think it was a successful recipe and everyone seemed to enjoy it. The balance of chocolate and strawberry was nice - I used a yellow cake which helped offset some of the sweetness but it would be good as a chocolate cake, too. Another benefit was that most of the ingredients I already had in my pantry - I only purchased a chocolate bar, strawberries and a cake mix. Plus, these fillings and frostings can also be used for a wide variety of other cakes and treats!

What desserts remind you of summertime?

Saturday, June 9, 2012

Home Cookin'

As you likely know by now, my boyfriend is a chef. He may tell you otherwise - his business card says “writer, animal lover, salesman, chef” and though he currently works as a waiter, above that, he is a chef. While we all egg him on to open his own restaurant in Anaconda, we are sufficing for delicious home cooked meals. It was important to Trevor that I got to enjoy the first dinner cooked in his new house and I am glad I did - I thought Lancaster had great sweet corn, but Montana? Montana wins this one. While orange juice, steak and corn on the cob is perhaps a strange combination, Trevor was only trying to ensure that I got all my needed vitamins and protein after a long day of traveling and a mile high difference in altitude. He’s sweet like that. Besides, he even offered to compromise on “some pulp” orange juice.


Before I even left for Montana, Trevor informed me that we were having a "dinner party”, as soon as we managed to get the house cleaned. If you know me, you know that I love anything with the word “party” and delightfully agreed. As a little bit of a back story, Trevor chose Anaconda because it is the home of an old friend from the Airborne, Scott, and his wife Michelle. During my week in Montana, they were both so incredibly generous and helpful - like I said, they took me to see the Univeristy of Montana! - and Trevor said it has been that way since he arrived in Montana. I’m not kidding you when I say that these two were some of the nicest and funniest people I have met in recent times - I’m not sure if it’s a Montana thing but I was so grateful. And that is why Trevor and I insisted on having them over for dinner. While I can tell you that I’ve never had something so delicious, I can’t share the recipe because Trevor kicked me out of the kitchen. I did the grocery shopping and cleaned for company but when it came to dinner, I was sent to McDonald’s to do my homework. I won’t complain though because I’m not sure I’ve had a better home cooked meal.

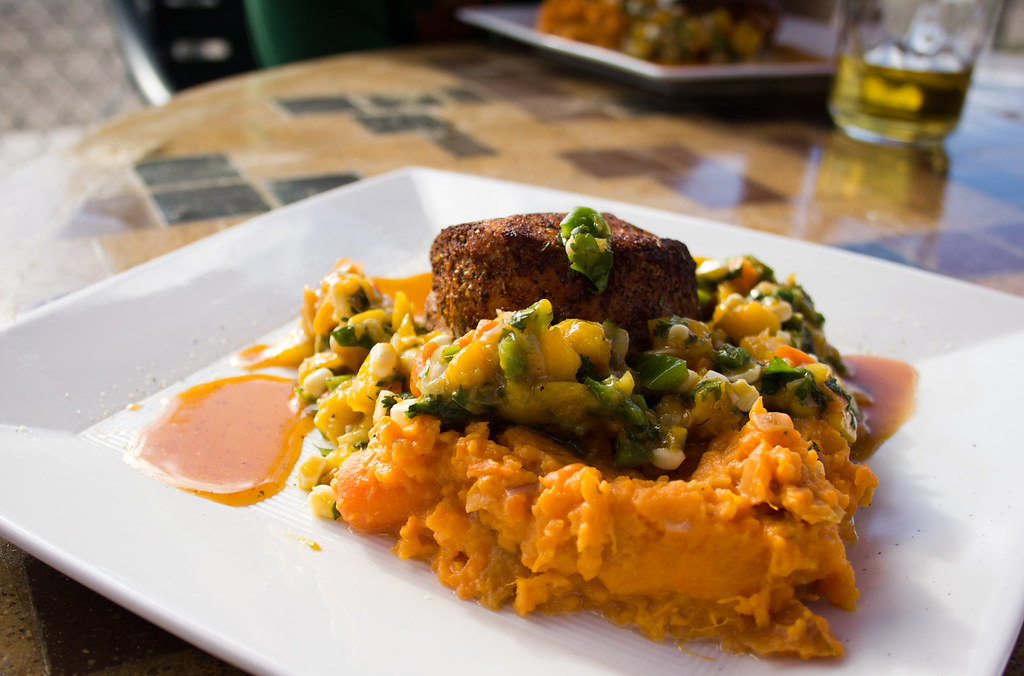
Pork Tenderloin with Sweet Potato Mash, Mango Chutney and a Smoked Paprika Caramel Sauce.
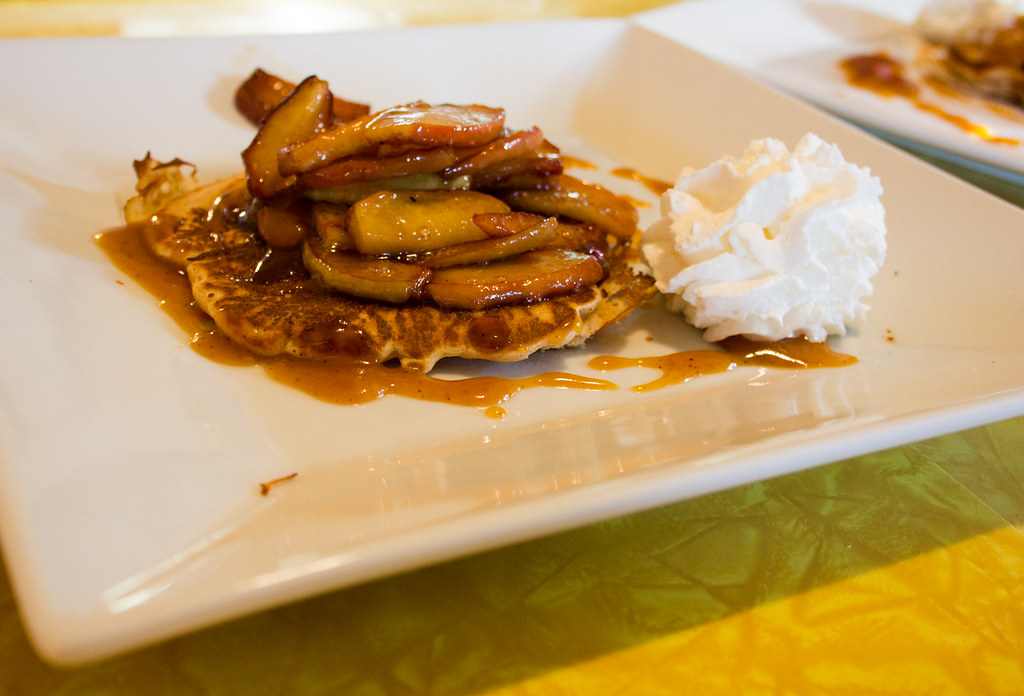
Gluten Free Pancakes (from Bob’s Red Mill) Topped with Caramelized Fuji Apples
And then, there was birthday cake. Prior to the planning of this last minute trip, I spent two days sulking at the thought of not spending Trevor’s birthday today. I debated how to bake a gluten-free cake and have it mailed, I tried to buy him a gift certificate to go for dinner on line.. Neither of those ideas seemed plausible. And then, the kindness of Montana was shown again when Amy of Amy’s Custom Cakes offered to not only make a gluten-free cake (for the first time) but to deliver it to Trevor’s home address, as a surprise. I rushed to the post office and mailed a card and candles to go with it, and managed to not even tell Trevor about it, but I was so delighted at how surprised he would be. Well, I obviously ended up in Montana for the big day but the cake was a delicious surprise, none the less. If you are in the Anaconda area, I highly recommend Amy for her incredible customer service, her beautiful cake decorations and considering how delicious our gluten free cake was - I can only imagine how delightful her other cakes must be!


We loved having a week to spend grocery shopping and cooking at home. And let me tell you, there’s nothing sweeter than waking up to a fresh cooked breakfast and hot chocolate in bed. While grocery shopping, making dinner and doing the dishes seem mundane alone at home, they are on our list of favorite things to do together and we’re both looking forward to two months of weekly grocery trips and home cooked meals to share. (I’m still not looking forward to washing dishes.)